When it comes to woodworking and home improvement projects, plywood is a versatile material that offers strength and durability. However, achieving a professional-looking finish when painting plywood requires careful preparation. One of the most common questions that arise during this process is: Should I sand plywood before painting? The answer is a resounding yes, but the reasoning behind it is multifaceted. In this article, we will delve into the importance of sanding plywood, the techniques to employ, and the best practices to ensure a smooth and lasting paint job.
Understanding Plywood and Its Characteristics
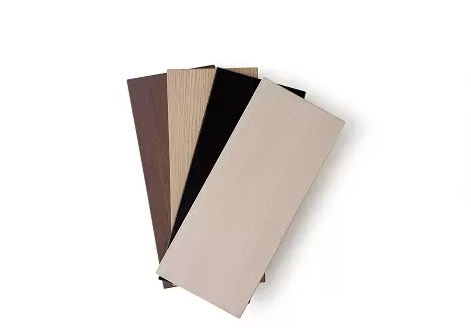
Plywood is composed of multiple layers of wood veneer, glued together to create a strong, stable sheet. While this construction provides excellent structural integrity, it also presents challenges when it comes to finishing. The surface of plywood can be uneven, with visible grain patterns and rough edges that can absorb paint unevenly. Additionally, the adhesive used in plywood can create a barrier that prevents paint from adhering properly. Therefore, sanding is not just a cosmetic step; it is a crucial part of the preparation process.
The Benefits of Sanding Plywood Before Painting
- Improved Adhesion: One of the primary reasons to sand plywood is to enhance paint adhesion. A smooth surface allows the paint to grip better, reducing the likelihood of peeling or chipping over time. Sanding creates micro-abrasions that help the paint bond more effectively.
- Smoother Finish: Sanding helps to eliminate imperfections such as bumps, splinters, and rough patches. This results in a smoother surface that not only looks better but also feels better to the touch. A well-sanded surface will reflect light more evenly, contributing to a professional appearance.
- Even Absorption: Plywood can absorb paint unevenly due to its layered construction. Sanding helps to create a more uniform surface, allowing for consistent paint absorption. This is particularly important when using water-based paints, which can raise the grain of the wood if not properly prepared.
- Reduced Grain Raise: When plywood is painted without sanding, the paint can cause the wood fibers to swell, leading to a raised grain. This can result in a rough texture after the first coat of paint dries. Sanding before painting minimizes this effect, allowing for a smoother finish after subsequent coats.
Sanding Techniques for Plywood
To achieve the best results, it is essential to use the right sanding techniques. Here are some steps to follow:
- Choose the Right Grit: Start with a medium-grit sandpaper (around 120-grit) to remove any rough spots and imperfections. Follow up with a finer grit (220-grit) to smooth the surface further. This two-step process ensures that you effectively prepare the plywood without over-sanding.
- Use a Power Sander: For larger sheets of plywood, a power sander can save time and effort. An orbital sander is an excellent choice, as it provides a smooth finish without leaving swirl marks. For edges and corners, consider using a sanding block or detail sander.
- Sand in the Direction of the Grain: Always sand in the direction of the wood grain to avoid scratching the surface. This technique helps maintain the natural appearance of the plywood while ensuring a smooth finish.
- Clean the Surface: After sanding, it is crucial to remove any dust and debris. Use a vacuum or a damp cloth to wipe down the surface. This step is vital, as any remaining dust can interfere with paint adhesion.
Additional Preparation Steps
While sanding is a critical step, it is not the only preparation needed for painting plywood. Here are some additional tips to ensure a flawless finish:
- Prime the Surface: Applying a primer specifically designed for wood surfaces can further enhance paint adhesion and provide a uniform base for your topcoat. Primers can also help seal the wood, preventing any potential bleed-through from knots or resin.
- Choose the Right Paint: Selecting the appropriate paint for your project is essential. For plywood, consider using a high-quality latex or oil-based paint, depending on the desired finish and durability. Always check the manufacturer's recommendations for compatibility with your primer.
- Apply Multiple Coats: For the best results, plan to apply multiple coats of paint. This not only enhances the color depth but also provides a more durable finish. Be sure to allow adequate drying time between coats, as specified by the paint manufacturer.
Conclusion
In conclusion, sanding plywood before painting is an essential step that should not be overlooked. It improves adhesion, creates a smoother finish, and ensures even paint absorption. By employing the right sanding techniques and following additional preparation steps, you can achieve a professional-quality finish that enhances the beauty and longevity of your plywood projects. Whether you're working on furniture, cabinetry, or decorative pieces, taking the time to properly prepare your plywood will pay off in the final result. So, the next time you find yourself asking, Should I sand plywood before painting? remember that the answer is a definitive yes—your project deserves it.